Showing posts with label table. Show all posts
Showing posts with label table. Show all posts
Monday, February 24, 2014
RE PURPOSING A GATE LEG TABLE

I just wanted to share a little project I finished up ...


I turned 1 antique mahogany gate leg dining table into 2 gate leg shabby chic console tables.

I added a few appliques to each table, and I added some paint layering so it looks
like they have been painted a dozen ties over their life span.


Sunday, February 23, 2014
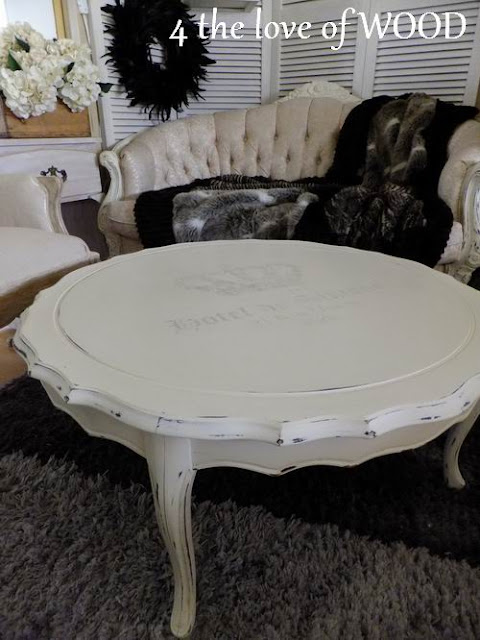
WARMING UP WHITE shabby chic coffee table

The weather today is rainy and curling up in a furry blanket would be wonderful,
but as every other day there is much to do. We delivered a large dresser into town last
night and had the honour of touring a large 1912 apartment in the midst of renovations.

That is one perk I never considered when I started up cycling furniture.
I have seen the inside of some wonderful homes around Vancouver, but when you started
to venture into the heart of downtown you get to see some magical history in the buildings.
Imagine the carved details of this love seat frame built into the walls and trim of a home.

Back in the country my latest endeavor is a provincial coffee table
with another wonderful french graphic.
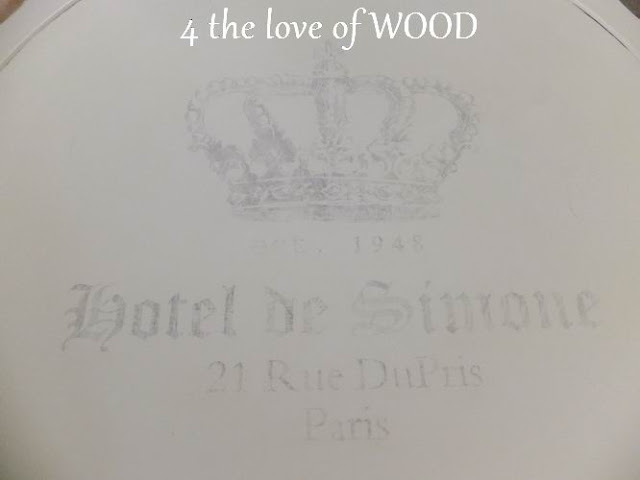
I dont do too many coffee tables but my mother had a hand in bringing this one to me
so I couldnt refuse. Could I?
******
The graphic used on this project was found awhile back, I dont know the source.

Sunday, February 16, 2014
table woodworking plans
 |
| table woodworking plans |
There are a few issues that you have to contemplate when evaluating the woodworking plans for caffeine table whether it is a free of charge or a paid out plan for anyone project table. Im fairly certain you have in mind your ideal centerpiece nevertheless please consider this to be three crucial sides before you start your current woodworking project.
The first point that you have to contemplate is the set of materials. Using a complete set of materials, youll save so much moment just to think again about what different you will be seeking for your project. Confident its Fine if you dont have a subscriber base but dont you imagine it would be annoying if you just received home from your store along with forgot an individual very important part for you woodworking project? Which has a complete set of materials, you happen to be half choice completed already. Free of charge woodworking plans for java table sometimes include a list of components and that is a single good prepare. Paid plans constantly come with a report on materials. The quantity of free plans using a list of components might be reduced so your alternatives for a java table plans that is similar to your desired table may additionally be reduced. With paid for plans, you have a large variety of selection which means your chances of choosing a table is much larger.
The second factor to weigh is the dimensions or height of you java table. The size of the living room along with your chairs should be proportionate to you personally project coffee table in any other case it might end up being a nuisance with your room as opposed to an fascination. For scaled-down sizes you can find no cost plans from the internet though the design might not acknowledge your around furniture. The large number of woodworking plans for java table in a paid out plan permits you to pick the best table that is certainly in harmony using your living room furniture.
 |
| patio table woodworking plans free |
Along with the last facet that is the most crucial for me will be the diagram as well as blueprint or step-by-step guide to make your caffeine table. Ive put in hours discovering the internet at no cost woodworking plans for java table and I nonetheless ended up restructuring the particular free prepare, because most plans I came across left myself with inquiries and not replies. Most have been incomplete along with left crucial part will be able to wonder and have. No wonder woodworking looked so hard.
Developing a good woodworking plans pertaining to coffee table stored me much time and money well, i think you should think about a paid out plan.
 |
| coffee table woodworking plans free |
 |
| picnic table woodworking plans |
Monday, February 10, 2014
Finished the Chestnut Table
Finished the table Thursday on the way out the door for the weekend ... It leaves for Connecticutt, Wednesday morning ...

7/1/09 update

Will and Jim sanding the second coat of stain .. The client decided to go with all stained chestnut, no paint on the base ... Its going to look sharp

Ready for the seal coat tomorrow
6/26/09
Were in the finishing process ... still work with the clients on the possible colors ( or not) on the base. the top color has been decided and thats set to go now ... Were debating a wash coat of paint, with more or less stain showing through .... click the pictures to enlarge them ....

Proposed paint samples for the legs and aprons

2nd coat of stain .. Lockwood aniline dye

The first coat of understain is sanded and ready to go ...
6/21/09
By the end of the day Friday, we had most of the construction and joinery completed .... Tomorrow we will cut the center legs and fit them up and then disassemble the whole thing for final sanding and glue up. Click the pictures to enlarge them ,,,,

Table top glue up

Handscraped and sanded ... Breadboard end stub tenon detail

Gluing up the two tenoned half rings ...

All together now .. 4:00 pm, Friday ... Trevor, doing his best Stayin Alive imitation before heading out for the weekend ...
Original post below

Close up of the original table base ...
Were making more and more pieces using recycled chestnut. Its a green material, being thats its timber recycled from old buildings, and, though I sometimes wonder about all the trucking that has to happen to get it to me from West Virginia, still, I feel good about it, people like it, I like using it, and it makes wonderful furniture. This table is more or less a copy of one we made in 2003 for my friends Susan Sargent and Tom Peters. Its a little wider than theirs, same length, and I think it will be all chestnut, no paint. Its an interesting table to build. Luckily, we have some handwritten notes from Ethan Verner, the last guy to carve legs like this in the shop. We dont do them often, but weve got it figured out now so it goes along pretty good when we do. Wills carving these and hes really got the hang of it now. More later as we progress.... Click the pictures to enlarge them ...

Laying out the spiral carving divisions using string and nails

First leg carved

Most of them done; top roughed out in the background ...

First page of notes from mahogany carved leg table 2004 ... I think Will used the saw on the first one, but then switched to carving directly with a freshly sharpened 1/2" veiner (V shaped chisel) (chizzle) ...

Page 2
Read More..
7/1/09 update
Will and Jim sanding the second coat of stain .. The client decided to go with all stained chestnut, no paint on the base ... Its going to look sharp
Ready for the seal coat tomorrow
6/26/09
Were in the finishing process ... still work with the clients on the possible colors ( or not) on the base. the top color has been decided and thats set to go now ... Were debating a wash coat of paint, with more or less stain showing through .... click the pictures to enlarge them ....
Proposed paint samples for the legs and aprons
2nd coat of stain .. Lockwood aniline dye
The first coat of understain is sanded and ready to go ...
6/21/09
By the end of the day Friday, we had most of the construction and joinery completed .... Tomorrow we will cut the center legs and fit them up and then disassemble the whole thing for final sanding and glue up. Click the pictures to enlarge them ,,,,
Table top glue up
Handscraped and sanded ... Breadboard end stub tenon detail
Gluing up the two tenoned half rings ...
All together now .. 4:00 pm, Friday ... Trevor, doing his best Stayin Alive imitation before heading out for the weekend ...
Original post below
Close up of the original table base ...
Were making more and more pieces using recycled chestnut. Its a green material, being thats its timber recycled from old buildings, and, though I sometimes wonder about all the trucking that has to happen to get it to me from West Virginia, still, I feel good about it, people like it, I like using it, and it makes wonderful furniture. This table is more or less a copy of one we made in 2003 for my friends Susan Sargent and Tom Peters. Its a little wider than theirs, same length, and I think it will be all chestnut, no paint. Its an interesting table to build. Luckily, we have some handwritten notes from Ethan Verner, the last guy to carve legs like this in the shop. We dont do them often, but weve got it figured out now so it goes along pretty good when we do. Wills carving these and hes really got the hang of it now. More later as we progress.... Click the pictures to enlarge them ...
Laying out the spiral carving divisions using string and nails
First leg carved
Most of them done; top roughed out in the background ...
First page of notes from mahogany carved leg table 2004 ... I think Will used the saw on the first one, but then switched to carving directly with a freshly sharpened 1/2" veiner (V shaped chisel) (chizzle) ...
Page 2
Table Saw Finds A New Home

Wednesday, February 5, 2014
a custom pool table

ok .. were getting close now ... as i wrote back on july 28th, theres a lot going on in the shop. for the last week or so though, trevor and will and i have been pulling the final pieces of the pool table together. pool tables are always a challenge because, typically, we havent built one for a while. our last one was in 2008 ... holy cow, no wonder we couldnt remember what we were doing exactly, and they are all different ... were wrapping this one up, and, wonder of wonders, well be starting another one in a couple of weeks. hopefully that one will be a breeze. .. click the photos to enlarge them ...


 the one above we built in 2003, so no one working with me now was working with me then. but fortunately, that table is local and, coincidentally, the client requested that we level it up as it was exhibiting a slight roll to one corner. after studying the roll, (it took 3 or 4 racks), we determined that the one corner was in the dead center of a +/- 30 clear span and either the thick carpet there had crushed or the joist had sagged ever so slightly. a piece of 1/16th inch veneer and two playing cards under one leg and we were back to level. it was a bonus, as we got to check it all out and remember how to build it.


after marking the angles using the standard measurements and angles from pauls article and a couple of jigs we have made, we cut them on our chopsaw, all on compound, fussy angles. the ends of the rubber than get different rubber cushion facings and then the felt is applied ... well cover that when we get to it ... soon
update 8/22

i still havent posted the felting of the rail details, but i hope to get to that tomorrow or maybe over the weeked. the table is finished now and it will be leaving for virginia next week on tuesday 
we set it up for a final check yesterday, using a piece of blue felt left over from another project. i only wanted to stretch the real camel piece once, when the table is set up for real ... plays great and im happy with the new design.
Subscribe to:
Posts (Atom)